Testing a capacitor on an air conditioner involves a few simple steps. First, ensure the power is off to avoid electric shocks.
Then, use a multimeter to check its functionality. Air conditioners are vital for comfort, especially during hot weather. A faulty capacitor can cause your unit to malfunction, leading to discomfort. Knowing how to test the capacitor can save you time and money.
It also helps in understanding whether the capacitor needs replacement or if another issue exists. This guide will walk you through the steps to test a capacitor safely and effectively. You don’t need advanced skills, just basic tools and a bit of patience. Stay with us to ensure your air conditioner works efficiently.
Introduction To Capacitors In Air Conditioners
Testing a capacitor on an air conditioner involves using a multimeter. First, safely discharge the capacitor. Next, connect the multimeter probes to the terminals and check the reading.
Capacitors are vital parts of air conditioners. They store and release energy. This helps the AC’s motors run smoothly. Without capacitors, your air conditioner may not start.
Importance Of Capacitors
Capacitors give the initial boost. They help the compressor and fans to start. They also keep these parts running. A faulty capacitor can cause your AC to fail. It might lead to higher energy bills. Regular checks ensure your AC runs efficiently.
Common Issues
Capacitors can wear out. They might bulge or leak. Sometimes, they lose their ability to store charge. This can cause the AC to hum but not start. It might also run for a short time and then stop. Checking capacitors can prevent these issues. It helps to maintain a cool and comfortable home.
Safety Precautions
Before testing a capacitor on an air conditioner, it is critical to follow safety precautions. Electricity can be dangerous. Safety must always come first. Below are essential steps to ensure your protection.
Power Off The Unit
Always turn off the air conditioner before starting any work. This prevents electrical shock. Locate the circuit breaker that controls the unit. Flip the switch to the “off” position. Verify that the unit is completely powered down.
Use a voltage tester to confirm there is no electricity flowing. This step ensures complete safety.
Wear Protective Gear
Wearing the right gear is crucial for safety. Always wear insulated gloves. This protects your hands from electrical shock. Use safety goggles to protect your eyes.
Wear long sleeves and pants. This provides added protection. Proper footwear is also important. Wear rubber-soled shoes to prevent electric currents.
| Protective Gear | Purpose |
|---|---|
| Insulated Gloves | Protects hands from electrical shock |
| Safety Goggles | Protects eyes from debris and sparks |
| Long Sleeves and Pants | Provides extra body protection |
| Rubber-Soled Shoes | Prevents electric currents |
Following these essential safety precautions can prevent accidents. Always prioritize your safety when working with electrical devices.
Tools Needed
Testing a capacitor on an air conditioner is a task that requires some specific tools. Ensuring you have the right tools will make the process easier and safer. In this section, we will discuss the tools you need for this task.
Multimeter
A multimeter is an essential tool for testing a capacitor. It measures voltage, current, and resistance. A digital multimeter is preferred for its accuracy and ease of use. Make sure your multimeter has a capacitance setting. This setting will help you get accurate readings of the capacitor’s condition.
Screwdrivers
Screwdrivers are necessary for accessing the capacitor in the air conditioner. You will need both a flathead and a Phillips head screwdriver. These tools will help you remove the cover and any screws holding the capacitor in place. Ensure the screwdrivers are insulated to protect against electrical shocks.
Credit: www.youtube.com
Accessing The Capacitor
Before testing a capacitor on an air conditioner, you need to access it. This involves several steps to ensure safety and accuracy. Below, you will find a detailed guide on how to locate and access the capacitor in your air conditioning unit.
Locate The Capacitor
The first step is to locate the capacitor in your air conditioning unit. The capacitor is usually found near the compressor or fan motor. It often looks like a small, cylindrical or oval-shaped object. If you’re having trouble, consult your air conditioner’s manual. This will provide diagrams and detailed information.
Remove The Access Panel
Once you’ve located the capacitor, the next step is to remove the access panel. This panel is typically held in place with screws or bolts. Use a screwdriver or wrench to carefully remove these fasteners. Keep them in a safe place, as you will need them to reassemble the panel later.
- Ensure the unit is powered off.
- Use insulated tools to avoid electric shock.
- Remove any debris around the panel.
After removing the access panel, you should see the capacitor and its terminals. Make sure to discharge the capacitor by shorting its terminals with an insulated tool before proceeding with any testing.
Discharging The Capacitor
Before testing a capacitor on an air conditioner, it’s essential to discharge it. A charged capacitor can hold a dangerous amount of electrical energy. Discharging ensures safety and accurate testing. Here’s how to do it effectively.
Use An Insulated Tool
Always use an insulated tool to discharge the capacitor. An insulated screwdriver is a good choice. This tool prevents electrical shock. Hold the tool by its insulated handle for safety.
Place the metal tip of the screwdriver across the capacitor terminals. This will create a short circuit, allowing the capacitor to release its stored energy. Ensure you are not touching the metal part of the screwdriver during this process.
Ensure Complete Discharge
Make sure the capacitor is completely discharged. Check the voltage with a multimeter. The reading should be zero volts. If not, repeat the discharge process.
For added safety, use a resistor to discharge the capacitor slowly. Attach the resistor across the terminals. This will ensure a gradual release of energy and prevent sudden sparks.
Once the capacitor is fully discharged, you can proceed with testing. Always prioritize safety to avoid accidents and ensure accurate results.
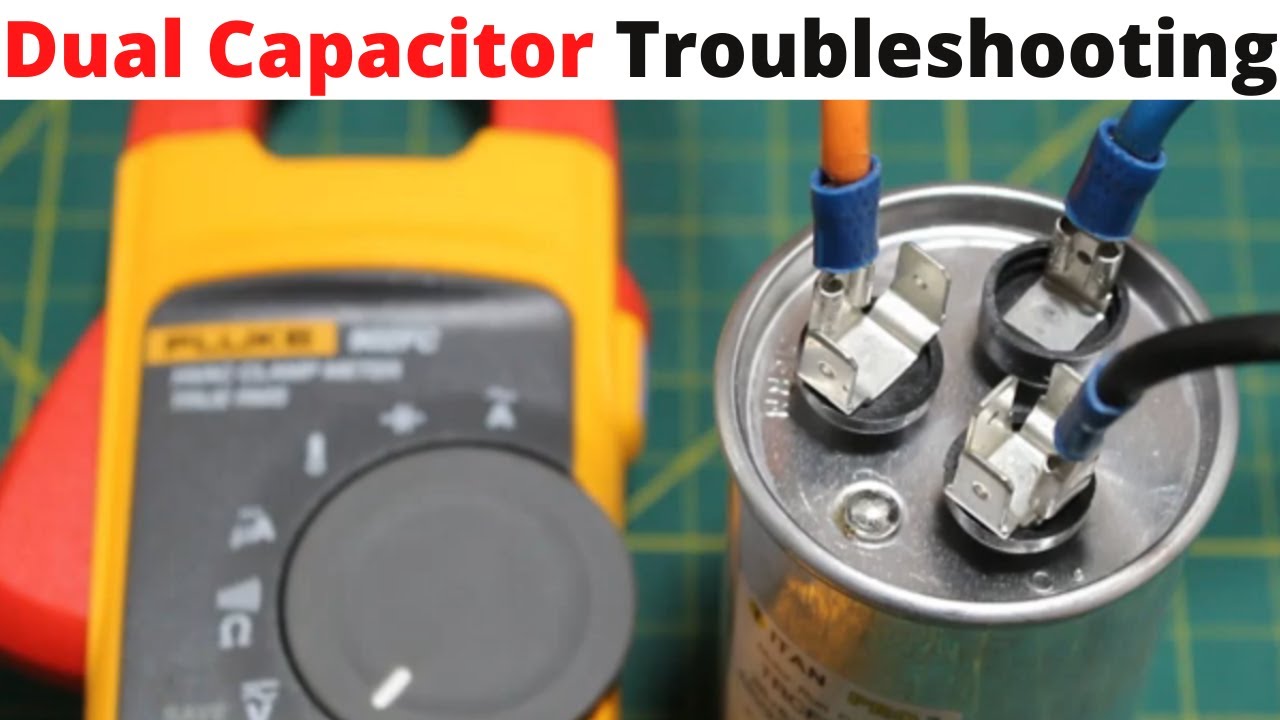
Testing The Capacitor With A Multimeter
Testing a capacitor on an air conditioner ensures it operates correctly. A faulty capacitor can cause various issues, including inefficient cooling and increased energy consumption. In this section, we’ll guide you through testing the capacitor with a multimeter. Follow these steps to check your capacitor’s health.
Set The Multimeter
First, ensure your air conditioner is off. Safety is crucial. Disconnect the power supply to avoid electric shock. Now, take your multimeter and set it to the capacitance setting. This setting usually has a symbol like a “μF” or “nF”. If your multimeter lacks this setting, use the ohm setting instead.
Check The Readings
Next, touch the multimeter probes to the capacitor terminals. Ensure a firm contact for accurate readings. If your multimeter is set to capacitance, the screen will display the capacitance value. Compare this value to the rating on the capacitor. For instance, if the capacitor is rated at 35 μF, your reading should be close to this value.
If using the ohm setting, the needle should move from 0 to infinity. This indicates the capacitor is charging and discharging properly. If the needle stays at 0 or infinity, the capacitor is faulty.
| Capacitor Rating | Expected Multimeter Reading |
|---|---|
| 35 μF | Close to 35 μF |
| 40 μF | Close to 40 μF |
Remember to replace a faulty capacitor immediately. This ensures your air conditioner runs efficiently. Regular checks can prevent bigger issues.
Interpreting The Results
Understanding the readings helps determine the capacitor’s condition. A healthy capacitor will show a steady voltage. Fluctuating readings may indicate a faulty component.
Testing a capacitor on an air conditioner is only half the job. You need to know how to interpret the results. This section will help you understand what the readings mean. You will learn to identify normal readings and signs of a faulty capacitor.
Normal Readings
A healthy capacitor should show a specific range of microfarads (µF). Check the capacitor label for its rating. Use a multimeter to measure the capacitance. A reading within 5-10% of the rated value is normal. For example, a 40 µF capacitor should read between 36 to 44 µF. Consistent readings in this range indicate the capacitor is working well.
Signs Of A Faulty Capacitor
Several signs indicate a faulty capacitor. First, look for a reading far from the rated value. A 40 µF capacitor reading 20 µF is faulty. Zero readings or infinite readings also signal failure. Physical signs are another indicator. Bulging or leaking capacitors are likely defective. Strange noises from the air conditioner can also point to capacitor issues. If your air conditioner struggles to start, the capacitor might be the problem. Replace it immediately to avoid further damage.
Replacing A Faulty Capacitor
Replacing a faulty capacitor in your air conditioner can seem daunting. But with the right steps, it is manageable. A capacitor stores energy and helps start the air conditioner’s motor. When it fails, the air conditioner may not work properly. This guide will help you choose and install a new capacitor.
Choose The Right Replacement
First, find the specifications on the old capacitor. It is usually printed on the side. Look for the voltage and microfarad (μF) ratings. These must match the new capacitor. You can buy a replacement from an HVAC supply store or online. Ensure you get the right type: round or oval.
Install The New Capacitor
Before starting, disconnect power to the air conditioner. This is crucial for safety. Use a screwdriver to remove the access panel. Locate the capacitor and note the terminal connections. Take a picture if needed. Carefully remove the wires from the old capacitor. Use needle-nose pliers if they are tight.
Install the new capacitor by connecting the wires to the same terminals. Secure it in place and replace the access panel. Restore power to the unit and test the air conditioner. It should run smoothly if everything is correct.
Reassembling And Testing The Unit
Once you have tested the capacitor and confirmed it is functioning, it’s time to reassemble and test the air conditioner unit. This step ensures that everything is put back correctly and the unit operates efficiently.
Reattach The Access Panel
Start by reattaching the access panel. This is an important step because it protects the internal components of your air conditioner.
- Place the panel back in its original position.
- Secure it with the screws you removed earlier.
- Make sure all screws are tightened properly.
A loose panel can cause vibrations and noise. It might also affect the unit’s performance.
Power On And Test
After reattaching the access panel, it’s time to power on the unit and test its functionality.
- Switch on the main power supply to the air conditioner.
- Set the thermostat to a cooling setting.
- Listen for any unusual noises.
- Check if the air blowing out is cool.
If the air conditioner runs smoothly and the air is cool, the capacitor is likely functioning well.
Remember to observe the unit for a few minutes to ensure it’s operating correctly.
Regular maintenance of your air conditioner can prevent issues and extend its lifespan.

Credit: serviceemperor.com
Maintenance Tips
Keeping your air conditioner in good shape requires regular maintenance.
One important part is testing the capacitor.
This ensures your AC runs efficiently and avoids bigger problems.
Below are some key tips for maintaining your air conditioner capacitor.
Regular Inspections
- Regular inspections are vital for your air conditioner.
- Check the capacitor at least twice a year.
- Look for any signs of wear or damage.
- Use a multimeter to test the capacitance.
- Compare the reading to the capacitor’s rating.
Here’s a step-by-step guide for testing a capacitor:
- Turn off the power to the air conditioner.
- Locate the capacitor in the unit.
- Discharge the capacitor using a resistor.
- Set your multimeter to the capacitance setting.
- Connect the multimeter leads to the capacitor terminals.
- Read the measurement and compare it to the rating.
Signs Of Future Problems
Identifying signs of future problems can save you time and money.
Look for these common issues:
- Bulging or leaking capacitor: This indicates it’s time to replace it.
- AC not starting: A faulty capacitor can prevent the AC from starting.
- Humming noise: This often suggests capacitor problems.
- AC not cooling properly: The capacitor might be failing.
Regular inspections and knowing the signs of problems help keep your AC in top shape.
This ensures your home stays comfortable during hot months.
Frequently Asked Questions
How To Test A Capacitor On An Air Conditioner?
To test a capacitor, first, turn off the power supply. Use a multimeter to check the capacitance. A reading within the specified range indicates a functional capacitor.
What Tools Are Needed To Test A Capacitor?
You will need a multimeter and insulated screwdrivers. Ensure you also have safety gloves and goggles for protection.
Why Test The Air Conditioner Capacitor?
Testing ensures the capacitor is functioning correctly. A faulty capacitor can cause the air conditioner to malfunction or not start at all.
Can You Test A Capacitor Without A Multimeter?
No, a multimeter is essential for accurate readings. It measures the capacitance and helps identify if the capacitor is faulty.
Conclusion
Testing a capacitor on an air conditioner is simple with the right steps. Always ensure safety by turning off the power. Use a multimeter to check the capacitor’s health. A healthy capacitor is essential for your air conditioner’s performance. Regular checks help avoid major issues.
Capacitors can wear out over time, so timely testing is crucial. A well-maintained capacitor ensures your air conditioner runs smoothly. Remember, a little maintenance goes a long way. Keep your air conditioner in top shape with routine checks. This will save you time and money in the long run.
Stay cool!
Leave a Reply