Installing an air conditioner in your wall may seem daunting. But it’s easier than you think.
In this guide, we’ll walk you through the steps to cool your home efficiently. Mounting an air conditioner in the wall can save space and improve your room’s aesthetics. Unlike window units, wall units offer a permanent solution and can be more efficient.
This guide aims to make the installation process simple and stress-free. You will learn the tools needed, how to prepare the wall, and the steps to secure the unit. Whether you are a DIY enthusiast or a beginner, follow these instructions to enjoy a cooler home. Let’s dive into the details and get your air conditioner up and running.

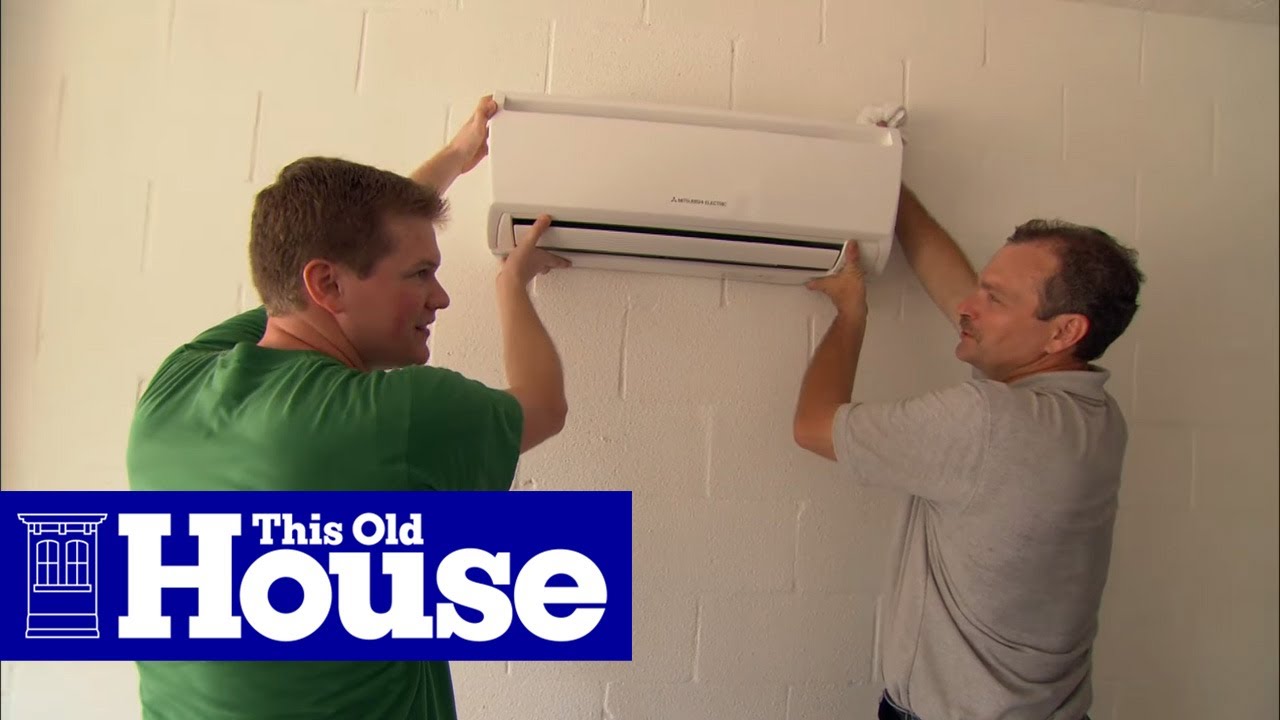
Credit: www.youtube.com
Choosing The Right Air Conditioner
Choosing the right air conditioner for your wall is crucial. The right unit will keep your home cool and comfortable. This section will help you make the best choice for your needs.
Types Of Wall Air Conditioners
Wall air conditioners come in different types. Each type has its own benefits. Here are the main types:
- Through-the-Wall Units: These units fit snugly into a wall sleeve. They are perfect for permanent installation.
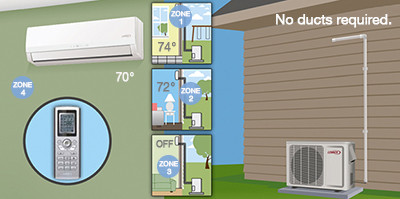
- Mini-Split Systems: These systems have an indoor and an outdoor unit. They are great for energy efficiency and quiet operation.
- Built-In Units: These are similar to through-the-wall units but are integrated into the wall. They offer a seamless look.
Measuring Your Space
Before buying an air conditioner, measure your space. This ensures the unit fits and cools the area properly.
- Measure the height and width of the wall space. This helps in selecting the correct size.
- Check the depth of the wall. Ensure it can accommodate the unit.
- Determine the room size. This helps in choosing the right cooling capacity.
Use the table below to match room size to BTU (British Thermal Units).
| Room Size (sq. ft.) | BTU Needed |
|---|---|
| 100-150 | 5,000 |
| 150-250 | 6,000 |
| 250-300 | 7,000 |
| 300-350 | 8,000 |
| 350-400 | 9,000 |
| 400-450 | 10,000 |
| 450-550 | 12,000 |
| 550-700 | 14,000 |
| 700-1,000 | 18,000 |
| 1,000-1,200 | 21,000 |
Choose the right air conditioner for a cool, comfortable home.
Gathering Necessary Tools And Materials
Before starting the installation of your air conditioner in the wall, it is important to gather all the necessary tools and materials. Having everything ready will make the process smoother and faster. This section will guide you on the essential tools and required materials for the job.
Essential Tools
Ensure you have the following tools ready before you begin:
- Drill – A power drill with various drill bits.
- Screwdriver – Both flathead and Phillips head screwdrivers.
- Level – A spirit level to ensure the unit is installed straight.
- Measuring Tape – To measure the dimensions of the space.
- Pencil – For marking positions on the wall.
- Utility Knife – To cut through drywall and insulation.
- Stud Finder – To locate wall studs for mounting the unit securely.
- Hammer – For driving nails as needed.
- Safety Glasses – To protect your eyes while drilling and cutting.
Required Materials
You will also need the following materials to complete the installation:
- Air Conditioner Unit – The main component to be installed.
- Mounting Brackets – To secure the unit to the wall.
- Screws and Anchors – For attaching the brackets and unit to the wall.
- Insulation – To seal any gaps around the unit.
- Caulk – To fill in and seal around the edges of the unit.
- Electrical Outlet Box – If you need to install a new outlet for the unit.
- Extension Cord – Ensure it is rated for the power of your air conditioner.
With all the tools and materials gathered, you are now ready to start the installation process. Having these items prepared will help ensure a successful and efficient installation of your wall-mounted air conditioner.
Selecting The Installation Location
When installing an air conditioner in a wall, selecting the right location is crucial. The correct spot ensures optimal cooling and efficiency. This section will guide you through the process of choosing the perfect place for your air conditioner.
Finding The Ideal Spot
Begin by finding a location that allows even air distribution. The best spot is usually in the center of the wall. This helps the cool air spread evenly across the room. Ensure the location is at least three feet away from any heat sources. This includes TVs, lamps, and other appliances.
Checking For Obstructions
Before you start, check for any obstructions inside the wall. This can include pipes, wires, and studs. Use a stud finder to locate any studs in the wall. Mark their positions with a pencil. Avoid placing the unit over studs, as this will make installation difficult.
Also, ensure there are no pipes or wires that may interfere. If you find any, choose a different spot. This prevents damage and ensures a smooth installation process.
Preparing The Wall
Installing an air conditioner in a wall involves several steps. The first crucial step is preparing the wall. A well-prepared wall ensures a secure and efficient installation. This section will guide you through marking the cutout area and cutting the wall opening.
Marking The Cutout Area
Begin by selecting a suitable location on the wall. Ensure the spot is free of any pipes or electrical wiring. Use a stud finder to locate wall studs. Mark the studs with a pencil. Measure the dimensions of the air conditioner unit. Transfer these measurements to the wall. Draw the outline of the cutout area.
Double-check all measurements. Ensure the cutout area is level and square. This step ensures the air conditioner fits perfectly.
Cutting The Wall Opening
Put on safety goggles and gloves. Use a drywall saw to cut along the marked outline. Cut slowly to avoid damaging the wall. Once the drywall is cut, remove the piece carefully. If you encounter any studs, use a reciprocating saw to cut them. Ensure the opening is clean and smooth. Remove any debris from the cutout area.
Inspect the opening. Ensure it matches the air conditioner dimensions. Adjust the cutout if necessary. Your wall is now ready for the next installation step.
Installing The Mounting Bracket
Installing the mounting bracket for your air conditioner is a crucial step. It ensures the unit stays secure and functions well. This guide will help you install the bracket correctly.
Securing The Bracket
First, choose the right spot on the wall. The location should have enough support. Use a stud finder to locate wall studs. These will help hold the weight of the air conditioner. Mark the spots where the screws will go. Drill pilot holes into the marked spots. This makes it easier to insert the screws.
Next, align the mounting bracket with the pilot holes. Hold the bracket firmly and insert the screws. Use a screwdriver to tighten the screws. Make sure the bracket is securely fastened. A loose bracket can cause problems later.
Ensuring Level Placement
Check if the bracket is level before finalizing the installation. Use a spirit level for this step. Place the level on top of the bracket. Adjust the bracket until it is perfectly level. This step is vital for the proper functioning of the air conditioner.
If the bracket is not level, the unit may not drain properly. This can lead to water leaks and damage. Once the bracket is level, double-check the screws. Make sure everything is tight and secure.
Credit: www.youtube.com
Placing The Air Conditioner
Placing the air conditioner correctly is crucial. This ensures optimal performance and energy efficiency. You need to follow some key steps to get it right. First, have all your tools and materials ready. This will make the process smoother.
Sliding The Unit Into Place
Carefully slide the air conditioner into the prepared wall opening. Make sure it is level. Use a spirit level to check. Adjust if necessary. A unit that is not level may not work properly. Ensure both sides fit snugly into the opening. This prevents any gaps for air to escape.
Securing The Unit
Once the unit is in place, secure it firmly. Use screws to anchor the air conditioner. Check your manual for the recommended number of screws. Tighten them well to avoid any movement. This ensures the unit stays stable during operation.
Next, seal any gaps around the unit. Use weather stripping or foam insulation. This helps maintain energy efficiency. It also keeps out dust and insects. Finally, double-check all connections and fittings. Ensure everything is tight and secure. This completes the installation process.
Sealing And Insulating
Sealing and insulating your wall air conditioner is crucial. It prevents drafts and keeps your home energy-efficient. Proper sealing stops hot air from entering and cold air from escaping. Insulating around the unit helps maintain a comfortable temperature indoors. Both steps are essential for the unit’s effectiveness and your comfort.
Applying Weather Stripping
Weather stripping is vital for sealing gaps around the air conditioner. It blocks drafts and prevents energy loss. Begin by measuring the gaps around the unit. Cut the weather stripping to the correct length. Peel off the adhesive backing and press it firmly into place. Ensure there are no gaps or overlaps. This creates a tight seal around the air conditioner.
Insulating Around The Unit
Insulating around the unit is the next step. Use foam insulation panels for this task. Measure the space around the air conditioner. Cut the foam panels to fit these measurements. Insert the foam panels around the unit. Make sure they fit snugly without gaps. This insulation keeps your home comfortable and energy-efficient.
Check for any remaining gaps after installing the foam. Use spray foam insulation to fill these small gaps. Spray foam expands to fill spaces, ensuring a tight seal. Allow the spray foam to cure as per the manufacturer’s instructions. Once cured, trim any excess foam for a neat finish. Your air conditioner is now sealed and insulated properly.
Testing The Air Conditioner
Testing the air conditioner is a crucial step after installation. This ensures everything works correctly before regular use. It also helps identify any issues that need fixing. Following the steps below will guide you through the process.
Powering On
First, plug the air conditioner into a power outlet. Then, turn on the power switch. Listen for any unusual sounds. If you hear any, turn off the unit and check for issues. If everything sounds normal, proceed to the next step.
Checking For Proper Operation
Set the air conditioner to a low temperature. Allow it to run for a few minutes. Check if cool air is coming from the vents. Feel the air to ensure it is cool. If it is not, there might be a problem with the cooling system.
Check the fan settings. Switch between different speeds. Ensure the fan responds correctly. The airflow should change with each setting.
Look for any water leaks around the unit. Water leaks indicate a drainage issue. If you see water, turn off the unit and inspect the drainage system.
Verify the remote control works. Test all buttons to ensure they function properly. If the remote does not work, check the batteries or try a different remote.
Credit: www.tlcplumbing.com
Frequently Asked Questions
How Do I Prepare The Wall For Ac Installation?
To prepare the wall, first, choose an appropriate location. Ensure there are no obstacles. Measure and mark the dimensions. Cut the opening carefully. Install a support bracket if needed. This ensures a stable and secure fit for your air conditioner.
What Tools Are Needed For Wall Ac Installation?
You will need a tape measure, level, drill, saw, screws, and a screwdriver. These tools help you measure, cut, and secure the air conditioner unit in the wall. Using the right tools ensures a successful installation.
Can I Install A Wall Ac Myself?
Yes, you can install a wall AC yourself if you have basic DIY skills. Follow the manufacturer’s instructions carefully. Ensure you have the right tools. However, if unsure, it’s best to hire a professional.
How Long Does It Take To Install A Wall Ac?
The installation process typically takes about 2-4 hours. This includes preparing the wall, cutting the opening, and securing the unit. The time can vary based on your experience and the complexity of the installation.
Conclusion
Installing an air conditioner in a wall can be straightforward. Follow the steps carefully. Gather all necessary tools and materials before starting. Measure and mark the wall accurately. Cut the opening precisely to fit the unit. Secure the frame firmly in place.
Insert the air conditioner and seal any gaps. Test the unit to ensure it works well. Proper installation improves cooling efficiency. Enjoy a cooler, more comfortable home with your new air conditioner. Always refer to the manufacturer’s instructions for best results.
Leave a Reply